In World of Warcraft, certain raid bosses have gained notoriety for their frustrating mechanics and coordination needs. Halondrus challenges you with orb management and precise positioning. Yogg-Saron tests your sanity management skills, while complicated mechanics in Sylvanas Windrunner’s encounter push your limits. Queen Azshara’s intricate phases demand strategic execution, as does the Siege of Orgrimmar raid with its extensive boss encounters. Learning about these bosses offers insights into mastering complex strategies and overcoming frustrations.
Key Takeaways
- Sylvanas Windrunner’s encounter involves complex mechanics and demanding coordination, leading to mixed community reception regarding its difficulty.
- Fallen Avatar’s overtuned mechanics and high damage requirements frustrate players, especially with recent legacy content scaling changes.
- Queen Azshara’s intricate fight and reliance on group performance often lead to frustration despite familiarity with mechanics.
- Halondrus challenges players with complex orb management, phase changes, and demanding raid positioning, testing team coordination.
- Yogg-Saron’s sanity management and hardmode challenges without Keeper assistance test players’ skill and perseverance.
Halondrus: The Complex Challenge
When you face Halondrus in the Sepulcher of the First Ones raid, you’re met with a complex challenge that demands precision, coordination, and quick reactions from your raid team. Orb Management is critical as you work to destroy orbs before they reach the boss, using abilities like the Lightshatter Beam. Debuff Strategies involve managing the Crushing Prism, using its puddles to slow orbs effectively. Preparation is crucial for success in raid encounters, as understanding boss attack patterns aids in anticipating and reacting to damage. Healing Requirements increase during Phase Changes at 80% and 50% health, where movement and high mobility are essential to avoid damage. During these phases, players not within 15 yards of spheres take moderate damage and knockback, making positioning critical. Raid Positioning is necessary to dodge Earthbreaker Missiles and Planet Cracker Beams. Tank Responsibilities include targeting orbs with beams and swapping after each use. As the fight progresses, teams must deal with Seismic Tremors which create damaging ground effects that need to be avoided. As Damage Output ramps up, especially in the final phase, Team Coordination and Gear Optimization are significant. Execution Precision is your key to mastering Halondrus and claiming victory in this demanding encounter.
Yogg-Saron: The Old God’s Test
Facing Yogg-Saron in the Ulduar raid is a formidable challenge, particularly without the aid of Keepers, as it requires your team to master complex mechanics and maintain high levels of coordination. The encounter begins with Sara in Phase One, where managing Yogg Saron mechanics, such as killing Guardians with Shadow Nova explosions, is vital. Phase Two introduces tentacle strategies, focusing on Constrictor, Corruptor, and Crusher Tentacles, while maintaining Sanity management. Avoiding the Death Ray is essential to prevent catastrophic damage, and splitting your raid into brain room and main fight groups enhances raid coordination. Yogg-Saron’s multiple difficulty levels are determined by the number of Keepers assisting, with the hardest difficulty being without any Keeper help. Despite being weaker than what Titans faced historically, Yogg-Saron still possesses considerable power, making the encounter a test of both skill and perseverance. Each Keeper grants a flat 10% damage buff to the raid, which can significantly aid in managing the fight’s demanding mechanics.
| Aspect | Details |
|---|---|
| Sanity Management | Starts at 100, mind control at 0 |
| Keeper Assistance | Buffs simplify mechanics |
| Phase Shifts | Coordination needed between phases |
| Hardmode Challenges | Fewer Keepers increase fight difficulty |
For those seeking Hardmode challenges, defeating Yogg-Saron without Keeper assistance offers greater rewards, but demands near-perfect execution.
Jaina Proudmoore: Strategic Execution
Facing Jaina Proudmoore in the Battle of Dazar’alor raid requires not only a high-level strategy but also precise execution, as her three-phase encounter, interspersed with intermissions, demands constant awareness and adaptability. The complexity of modern raid bosses, such as Jaina, echoes the increased complexity in mechanics seen in current WoW raids, where players must juggle multiple simultaneous challenges. The encounter gained notoriety when Method’s strategy involved ignoring the add, sparking debate over whether it was an exploit or a clever tactic. You’ll need to manage intricate ice-themed mechanics, such as handling explosive barrels on the ship and avoiding Glacial Shards, while coordinating effectively with your team to interrupt her powerful abilities like Howling Winds. As the encounter progresses into the final phase, the complexity increases, challenging you to quickly free frozen allies and eliminate her Prismatic Image to prevent overwhelming damage from her relentless attacks. Tanks must carefully taunt swap to manage Ice Shard stacks, ensuring that Jaina is always faced away from the raid to minimize damage to the group.
High-Level Strategy Required
Tackling Jaina Proudmoore in a high-level raid demands a strategic execution that incorporates complex mechanics, requiring each team member to understand and perform role-specific tasks with precision. You’ll need strategic adaptability to handle unexpected changes and mechanic mastery to navigate the intricacies of her fight. Your team must coordinate effectively, managing adds and environmental hazards while optimizing positioning and movement. Understanding phase management is essential, as different phases call for unique strategies. For instance, during the Silken Court raid, bloodlust is recommended at the start of the fight to maximize damage output and efficiency. Utilize add-ons for real-time data, ensuring effective communication and pre-fight planning. Post-fight analysis and community resources can refine strategies, leading to continuous improvement. Mastering these elements is key to overcoming Jaina’s challenges and achieving victory in one of WoW’s most demanding encounters. The difficulty perception of bosses like Jaina has evolved over time, with players now expecting more intricate mechanics and higher levels of coordination due to past experiences with challenging bosses. Bosses like Volcoross require the raid to be carefully split into two groups to handle specific mechanics, emphasizing the importance of team coordination and role assignment.
Execution Challenges Faced
When engaging in the Jaina Proudmoore encounter, players face a series of execution challenges that test their coordination and adaptability. Mastering the mechanical complexity is critical, as you’ll need to navigate area denial, manage debuff dynamics, and optimize burst windows. Timing and coordination are key, requiring precise movement to dodge Ring of Ice and Glacial Shards. Role-specific responsibilities necessitate tanks positioning Jaina while ranged DPS handles munitions barrels. During phase shifts, adaptability is essential, especially with unpredictable hazards like Searing Pitch. The fight begins on a ship with marine adds, where players must also manage explosive charges and bombardments effectively. The encounter is structured into three distinct phases, each demanding strategic adjustments as Jaina’s abilities evolve. Resource management, including the strategic use of cooldowns like Bloodlust, is important. Efficient add management prevents excessive raid damage, while timely interrupts and crowd control help mitigate Jaina’s elemental threats, ensuring a successful encounter. The Lich King (25-Man Heroic) encounter, although not directly related to Jaina, is often considered one of the most difficult bosses, showcasing how challenging encounters have evolved in WoW’s history.
Fallen Avatar: The Overtuned Encounter
Although many raid bosses in World of Warcraft present a challenge, the Fallen Avatar fight stands out due to its overtuned mechanics and high damage requirements, demanding exceptional coordination and strategy from your raid team. The encounter mechanics involve two phases, starting with managing the boss’s abilities while preventing energy accumulation. You’ll need to handle Unbound Chaos, which forces constant movement, and Shadowy Blades, ensuring they’re directed away from the group. Recent changes in legacy content scaling have frustrated players, as bosses like the Fallen Avatar require much higher levels to defeat, echoing issues seen in Black Temple and Firelands.
Key strategies include:
- Containment Pylons: Block these with the Maiden of Valor to prevent energy gain. If the energy reaches 100, he absorbs the Maiden’s health, making it crucial to manage energy effectively.
- Desolate Debuff: Tanks must swap after two stacks to manage damage.
- Rupture Realities: Move to safe areas to avoid platform destruction.
- Ranged and Healer Positioning: Spread out horizontally for effective management of abilities.
- Platform Destruction: Tank the boss in corners during Phase Two to minimize damage.
The encounter represents a significant threat to Azeroth, requiring proper practice and communication to master these complex mechanics.
Sylvanas: Frustrating Progression

After overcoming the overtuned challenges of the Fallen Avatar, players face the intimidating task of progressing through the Sylvanas Windrunner encounter, known for its intricate mechanics and demanding coordination. Sylvanas’ mechanics are notorious for their phase challenges, requiring teams to navigate complex shifts. In Phase Two, effective add management is essential, as failing to interrupt and eliminate them quickly can lead to overwhelming the team. Managing the Mawforged Souljudge’s Crushing Dread DoT is crucial, as dispelling it improperly can transfer the debuff to another player, potentially causing a wipe if not handled correctly. Phase Three intensifies the difficulty with platform navigation, where you must manage debuffs and avoid environmental hazards. The current raid skip mechanics add an additional layer of strategy, as obtaining a skip to Sylvanas requires killing KelThuzad four times, which can affect a guild’s progression decision between extending or re-clearing. The community reception of Sylvanas’ fight is mixed; some find the complexity engaging, while others view the progression as frustratingly steep. The narrative impact, tied to Sylvanas’ character arc, affects how players perceive the encounter. As WoW strives for balanced PvP gameplay and engaging narratives, encounters like Sylvanas’ highlight the intricate balance between gameplay complexity and storytelling. Additionally, technical issues, such as latency, can hinder gameplay, adding to the overall challenge. The fight embodies a culmination of Sylvanas’ storyline, demanding both skill and emotional investment.
Sepulcher of the First Ones: Unbalanced Wipe Rates
The Sepulcher of the First Ones raid in World of Warcraft presents a significant challenge to players, with unbalanced wipe rates that can test even the most seasoned guilds. Each boss offers unique hurdles, leading to varying wipe rate variability and necessitating tailored guild strategies. The Jailer’s high pull count highlighted the difficulty many guilds faced, with SK Pieces requiring 396 attempts to achieve victory. In contrast, Rygelon’s precise coordination demands resulted in different completion times across guilds. Coordination among raid members is crucial to manage mechanics effectively, as failure to execute can lead to wipes or significant damage. The competition remained dynamic and unpredictable, with multiple guilds vying for top positions, including Method, Liquid, Skyline, SK Pieces, Aster, BDGG, JTH, and KeaHoarl. Notably, Halondrus stood out as a significant challenge with 300-450+ pulls required by top guilds, underscoring the raid’s intense difficulty. To tackle these challenges, guilds employed several strategies:
- Adjusting raid member roles to optimize performance.
- Focusing on specific mechanics unique to each boss.
- Utilizing trial and error to refine techniques.
- Increasing item levels to decrease wipe likelihood.
- Marking progression milestones to boost morale.
Siege of Orgrimmar: The Long Haul
Siege of Orgrimmar stands as a memorable raid in World of Warcraft, challenging players with its expansive scope and demanding mechanics. Located in the eastern Vale of Eternal Blossoms, this Tier 16 raid wraps up the Mists of Pandaria expansion with 14 intricate boss encounters that test your adaptability and strategic planning. From the outset, bosses like Immerseus require you to deftly maneuver between phases, balancing healing and damage. The Fallen Protectors demand precise positioning and reactions to shifting raid mechanics, while Kor’kron Dark Shaman’s shared health adds layers of complexity as the fight progresses. General Nazgrim’s encounter tests your ability to manage adds effectively, and Malkorok’s short enrage timer requires focused execution. Notably, players have faced issues with mobs evading before Siegecrafter Blackfuse, which has been a source of frustration. With a mix of 10-man, 25-man, LFR, and flexible raid formats available, players could tailor their experience to their preferred group size. Throughout, synergy and gear are critical, as these encounters punish missteps and demand refined boss strategies. Each fight’s challenges and frustrations contribute to the raid’s enduring reputation among players.
Queen Azshara: The Strategy Puzzle
In the challenge of Queen Azshara, you’re tasked with a highly intricate fight that demands precise execution of mechanics across multiple phases, each with its own unique challenges and shared elements like the Ancient Wards. Coordination is key, as your team must effectively manage adds and player debuffs while preventing these threats from reaching critical points, such as the Ward of Power. Successfully maneuvering this encounter tests every aspect of a raid group’s strategy and teamwork, making it one of the most demanding experiences in WoW. Many players have expressed frustration with reliance on group performance, as familiarity with mechanics does not guarantee victory. Among the most crucial tasks, managing the Energy levels of the Ancient Wards stands paramount, as allowing them to deplete can lead to catastrophic failure and wipe the raid. During the intermission phases, players must soak Arcane Orbs and adhere to Queen’s Decrees to transition smoothly to subsequent phases.
Mechanics Require Precise Execution
Although managing Queen Azshara’s intricate mechanics may initially seem intimidating, it ultimately boils down to precise execution and strategic coordination among raid members. You need to focus on mechanical execution through strategic planning to overcome the challenges posed by the fight’s complex structure. The four phases and shifts demand a clear understanding of each mechanic:
- Ancient Wards: Prevent raid-wide damage by managing their energy.
- Ward of Power: Control the energy levels to regulate the raid’s damage intake.
- Azshara’s Decrees: Follow these to maintain ideal movement and positioning.
- **Arcane Burst and *Beckon***: Avoid these by positioning correctly and moving out of danger.
- Nether Portals: Handle these effectively to minimize energy drain and damage.
The fight dynamics change with each attempt, requiring players to continuously adapt and refine their strategies. In particular, players must prioritize adds over the boss when they are present to ensure successful management of the fight’s mechanics. Understanding these elements is essential for success.
Coordination Challenges for Teams
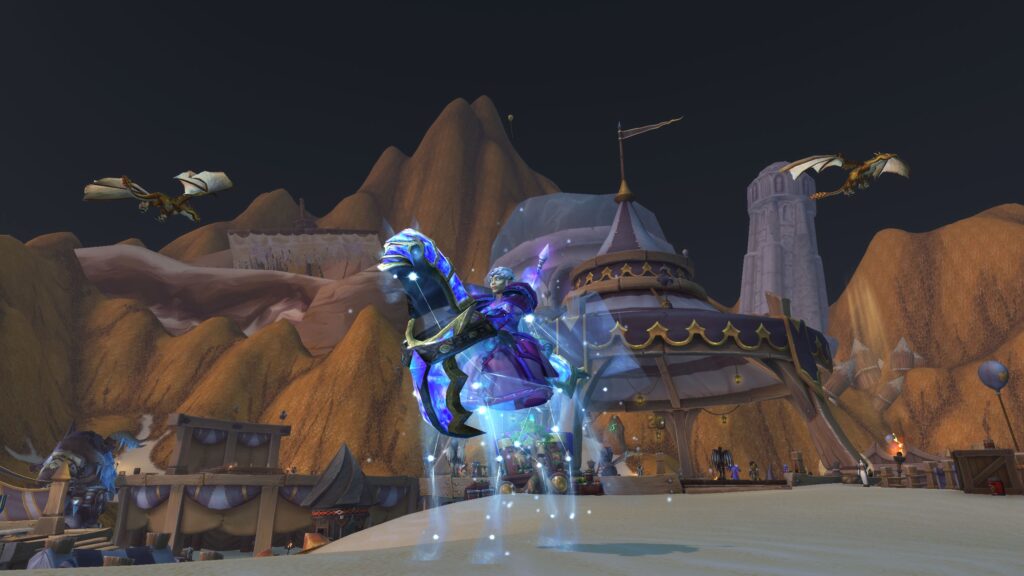
Mastering Queen Azshara’s mechanics is only part of the challenge; effectively coordinating your team is where the real strategy puzzle begins. Ancient Ward management requires dynamic adjustments, demanding a seamless rotation to mitigate raid-wide damage. Add prioritization is important, as handling Azshara’s Indomitable and Devoted can make or break the fight. Positioning strategies are critical for avoiding unnecessary damage and executing mechanics like Arcane Detonation. Communication efficiency guarantees everyone knows their role-specific tasks and can manage debuffs like Drained Soul. Tanks must precisely time abilities, while healers tackle relentless damage. DPS players focus on add control to prevent mind control. The divide-and-conquer beam poses a significant threat, as touching it results in instant death, requiring the team to maintain precise positioning. Error recovery techniques are indispensable, as quick adaptation can save the raid from cascading failures in this high-difficulty encounter.
Frequently Asked Questions
Which Raid Boss Had the Longest World-First Kill Attempt?
When tackling the longest kill for a World First, you’ll find C’thun holds the record, with an arduous 86-day battle. In vanilla WoW, guilds had to devise intricate World First strategies, maneuvering overtuned mechanics and limited resources. The encounter required exceptional coordination and persistence, as guilds faced not only C’thun’s formidable abilities but also the game’s early bugs and design challenges, making this victory particularly remarkable in raiding history.
How Do Players Typically Prepare for Complex Raid Mechanics?
In your quest to tackle complex raid mechanics, you should consult strategy guides, much like adventurers of yore sought wisdom in ancient tomes. Use communication tools, like Discord, to guarantee your team operates seamlessly. Practice in lower difficulties to gain familiarity with boss phases and mechanic timing. Optimize your class rotations and gear progression, and adapt strategies based on feedback, assuring you’re always ready to conquer the challenges ahead.
What Are Some Tips for Maintaining Team Morale During Difficult Encounters?
To maintain team morale during difficult encounters, focus on team bonding by encouraging open communication and collaboration. Use positive reinforcement to acknowledge efforts, even if the desired outcome isn’t achieved immediately. Regularly highlight individual contributions and celebrate small victories to keep spirits high. Organize team-building activities outside of raids to strengthen trust, and address any conflicts promptly to guarantee a respectful and unified team environment, enhancing overall morale and effectiveness.
Are There Any Raid Bosses Known for Unpredictable RNG Elements?
You think you’ve got it all figured out, and then RNG mechanics throw you for a loop. Kil’jaeden’s Fire Bloom, The Fallen Avatar’s Dark Mark, and Uu’nat’s Unstable Resonance all excel at delivering unforeseen outcomes. Each mechanic requires quick reflexes and strategic positioning, adding layers of unpredictability. You’ll find yourself battling not just the boss, but the very chaos these elements introduce, testing your team’s skill and patience relentlessly.
How Do Raid Bosses Impact the Game’s Meta and Player Strategies?
Raid bosses greatly shape the game’s meta by influencing raid composition and strategy evolution. You must optimize your group, balancing roles like tanks, healers, and DPS to counteract boss mechanics. This demands strategy evolution, where you adapt tactics based on boss phases or new abilities. Consequently, raid bosses drive players to innovate, ensuring their strategies are efficient and effective, fostering a dynamic gaming environment that continually challenges your skills and knowledge.
Conclusion
In your journey through World of Warcraft’s most frustrating raid bosses, you’ve encountered a diverse set of challenges, each demanding strategic depth, precise execution, and patience. Importantly, only 0.5% of guilds managed to defeat Queen Azshara during her first week, highlighting the difficulty and complexity of these encounters. These bosses test your limits, requiring not just individual skill but also seamless teamwork and adaptability, forming the backbone of WoW’s enduring appeal and keeping you engaged raid after raid.